Archives: 6. Oktober 2012

Unexpectedly…

…I am here for another post!

I made these as a present for a christening and a birthday – less than a month apart. The little bag is an adapted version of this and these (hard to believe I made these more than four years ago!):

I just love the apple fabric – I think I got it at Frau Tulpe’s fabric store in Berlin quite some time ago. It’s nice to see it put to work finally…

If the bag was considered the birthday part of the present, the little crochet hat has to function as a christening present. I used this butterfly hat pattern and I hope it’ll fit. Isn’t that butterfly (bow?) detail just adorable? And very simple to make, too!

All in all, making these took but one day – and I even had some time left to whip up a little stuffed fish from leftover fabrics for each of my children – they really do have enough stuffed animals without these, but making them was quite a lot of fun!

It’ll probably be a while now – I need to recover from posting twice within days…

Katrin


On the go

I recently discovered a must-have accessory for any Lego-loving kid: the Lego Storage Bag/Playmat – and made one as a gift to two little boys.

If you know any children playing with Legos you have probably had the pleasure of stepping on a piece once or twice. Also, you might have dutifully (and silently cursing?) picked up what seems like a thousand pieces scattered on the floor. This storage bag /playmat solves at least the picking-up problem – provided you can convince your Lego player/builder/architect to actually keep the pieces on the mat.

Once done playing, you just draw on the bag’s drawstring and – there you have it: pieces all contained in a neet storage bag, ready to be put away with no risk of stepping on stray Legos…

This playmat is easy to make – but if you don’t have time, an old sheet works just as nicely for quickly picking up Legos, just not for taking them with you. The easiest way to make the mat would be to cut two rather large circles of fabric for the front and back, sew them together wrong side up and leaving a hole for turning. Once turned, you can add grommets for the drawstring and the drawstring itself.

I had some laminated fabric lying around and used that as the back side – thus this bag could probably double as a picknick bag/blanket. Since I didn’t have enough left of either one kind of fabric, I used both to form a circle:

On the front side, I decided to make up some streets and blue fabric that could work as the sea, and some green and grey for building on. The little landscape looks like this:

I just might have to make one for my own children – I think it’s much nicer than just an old sheet – what do you think?


Katrin


Well, as it is indeed July…

… I’ll post our advent calendar as I promised to!

I have always loved advent calendars. They’re very common in Germany and pretty much every child gets to open one from December 1st through 24th. They used to be made from paper and behind each little door was a different pictures. My mother told me that she and her two brothers shared one calendar and it was the same each year! They didn’t seem to mind, though…

Today, advent calendars come in all varieties – filled with little or rather large pieces of chocolate, pralinés, or even toys – and most families will have at least one for each child. Many people craft advent calendars, too, for their children, their significant other, their parents, siblings, friends… advent calendars in abundance! I admit to being one of the crafters and thus our children would get a calendar each year, filled with little presents such as candy, small toys or wooden ornaments for the christmas tree. As nice as that sounds – and actually is! – it has three flaws:

  • chocolate and candy are already omnipresent in December
  • what’s inside each day gets more important than waiting for Christmas
  • considering the chocolate overload one is likely to spend quite a lot on these „little presents“

The solution to the puzzle came when I stumbled about this lovely advent sew-along over at homemade by jill. Isn’t it great? It uses little felt ornaments that the children can hang to a fabric tree each day and you can just store it away after the holidays and hang it back up the next year. Deciding to make one was a no-brainer, actually getting started (and finished) before December 1st quite a challenge.

I started by buying the wool felt I mentioned in my last post. It looks and feels fabulous – it’s quite firm and brightly colored and well worth the expanse. I made a base out of white felt, added 24 rings to the bottom half (a button-fastening sewing machine comes in quite handy at this point!). From green fabric I had left over I cut a triangle to act as the tree, added 24 hooks (as in hooks and eyes) and some reflector piping along the sides for fun. I then sewed this to the upper half of my felt base and had this:

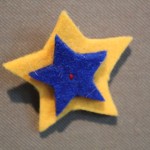
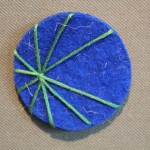
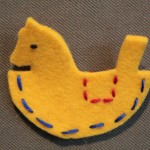
Then, of course, the ornaments had to be designed, cut, sewn/embroidered and eyes (as in hooks and eyes) fastened in the back. My husband did all of the designing – he searched for existing templates on the web, edited them to fit our needs and made some himself. A tiny selection:

Then I made little sachets from burlap, put an ornament into each of them, tied them with string and hung them to the rings. Now we had this:

The reflector piping makes for a nice snow-like flash effect, don’t you think? Other than in flash photography it only shows from certain angles, though.

And here’s how it changed between December 1st and 24th:

Thanks to Michael for taking all the pictures and animating them!

The children shared the calendar – taking turns in opening each sachet and hanging the ornament. They didn’t seem to mind at all that there were no „real“ presents involved and even suggested using the calendar again next this year.

Here it is again in all its glory:
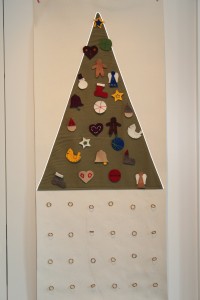
Now go and make one – you have 139 days starting today!

Katrin


Happy New Year!

I owe you more than one post, but first and foremost: Happy New Year to all readers and thanks for checking in!

To show you at least one – even if teeny tiny – sewing project, here’s this year’s christmas craft:

Felt angels

I made the angels from wool felt I had left over from the advent calendar my husband and I made for the kids this year. Unlike felt you get in most craft supply stores this is made from real wool and quite sturdy. It came in beautiful colours, there also was yellow, green, dark brown, purple… just wait for the advent-calendar-post (at the rate I’m going now, I think it’ll be up in July).

Anyway, the hard thing was to actually cut the felt – I used nail scissors. Everything else is rather self-explanatory, each angel is made from two parts joined together by a couple stitches. I used contrasting thread and kept a sling for hanging the angel. I love how they turned out (and that they were quick to make). They make for a lovely addition to any present and they fit in a small envelope – so you could add them to your christmas cards as well!

Here’s what one looks like in a tree:

Angel in tree

Now it might just be time to put it away and store it safely until December. Here’s hoping I’ll get around to posting a little earlier than that.

Katrin